On this page I will show the sculpture projects which I completed in Spring 2007. These were made in two bronze pours and one iron pour at the Sculpture Studio at Binghamton University. I also completed a small granite sculpture using some equipment at the studio of Helaman Ferguson in Baltimore.
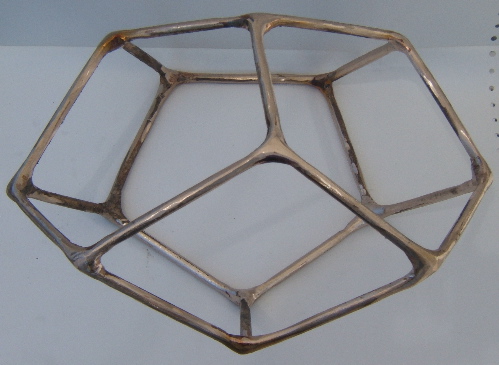
Everyone is familiar with the famous Platonic Solids, including the dodecahedron whose faces are regular pentagons. A more unusual shape is created when the three pentagons on the top and the three pentagons on the bottom of the dodecahedron are joined so as to form the figure called an associahedron. Instead of thinking of it as a solid, one can consider just the vertices and edges as a graph drawn in space. This three dimensional graph occurs in several parts of mathematics, including the theory of cluster algebras, where it is the exchange graph for the triangulations of a hexagon.
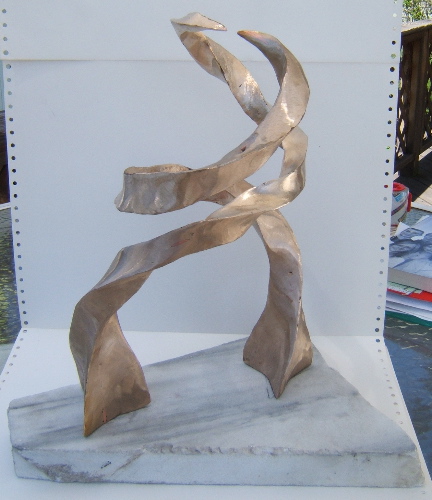
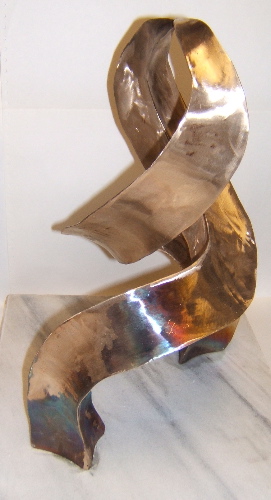
When I made a trefoil knot with hypocycloid cross-section, I also planned to made other sculptures with that cross-section, and the first ones are based on the helix, so I call these helical hypocycloids. The double helix is very famous in biology because of its role in the structure of DNA, the building blocks of all life. In this next sculpture, a slender double helix rising from a marble base creates a pair of forms that entwine around each other, tapering to points, and curving in towards each other.
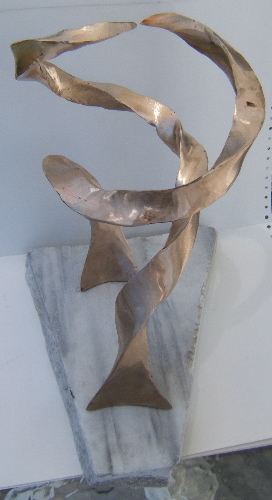
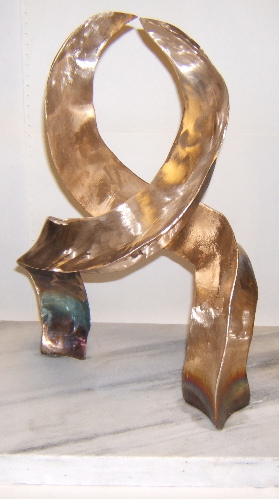
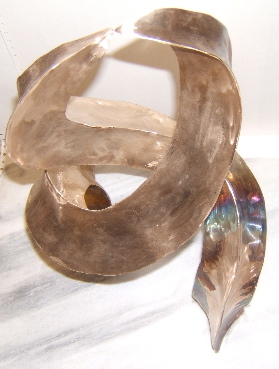
I also made a larger version of the helical hypocycloid, whose size and deeper curved surfaces give a different impression.
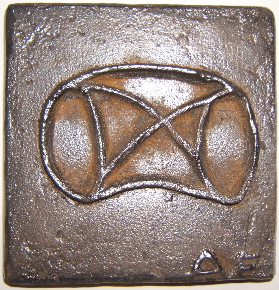
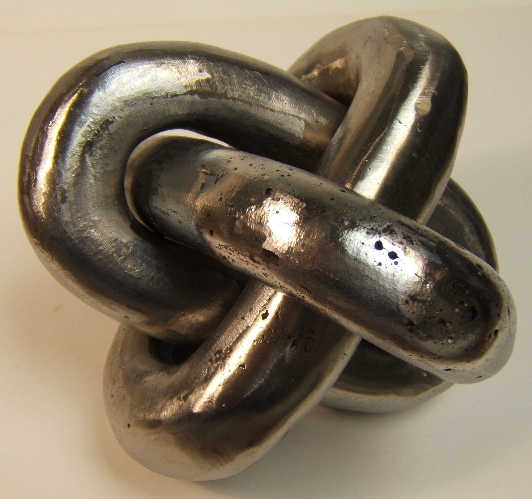
The techniques for casting iron are somewhat different from those for casting bronze. The form to be cast can be made in wax or clay (plastilene), and is embedded in a mold made of fine sand treated with a special hardening resin. I used an open-face mold to create a sculpture on one side of a piece of iron, and also a closed mold with two parts to create solid iron rings. Three rings were attempted in order to make the Borromean rings, but the third ring was made split for assembling the group. Problems with the casting of that split ring were solved by extensive welding. I found it much harder to weld this iron than to weld bronze, mostly because of the impurities in this iron, which caused pitting which can be seen on the surface. From an artistic point of view, one might want such random irregularities for character, but they were not really intentional. Here are pictures of the open-face mold, of two closed rings waiting for the third, and of the completed iron Borromean rings sculpture.
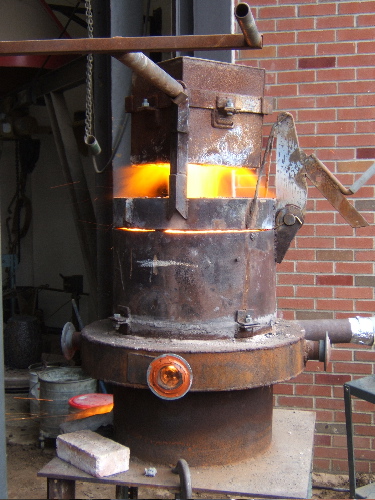
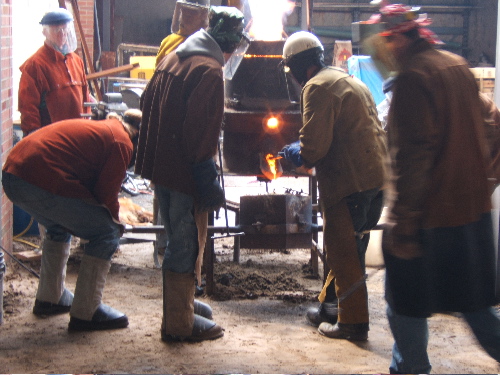
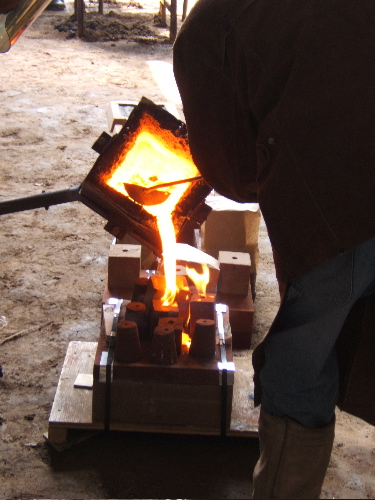
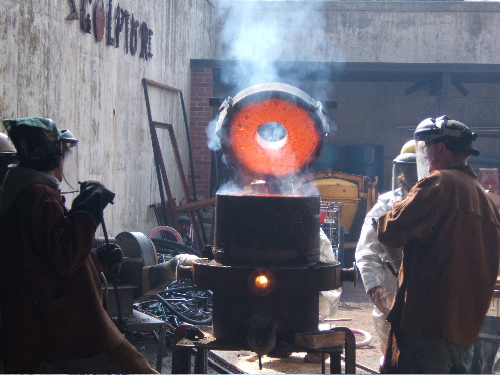
During the iron pour I took pictures and a short movie with my digital camera. It shows how the team of students heated the iron in a specially made furnace (named ``Xena"), and handled the ladle of molten iron (about 3000 degrees F) and poured it into a series of molds on the floor of the foundry. It can be seen how one mold broke open and molten iron ran out, causing a problem! I have this short movie encoded two ways, first as an avi file, and then as a mov file. These can be downloaded from the following two links. Pictures are shown below.
Download avi movie file of iron pour here. Download mov movie file of iron pour here.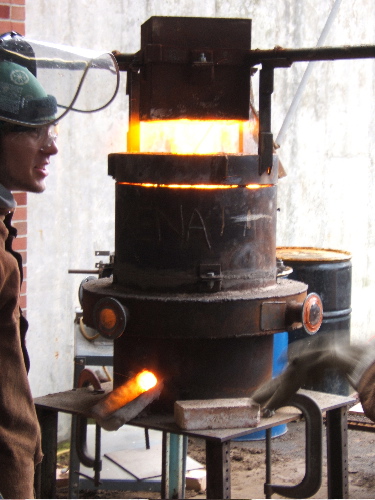

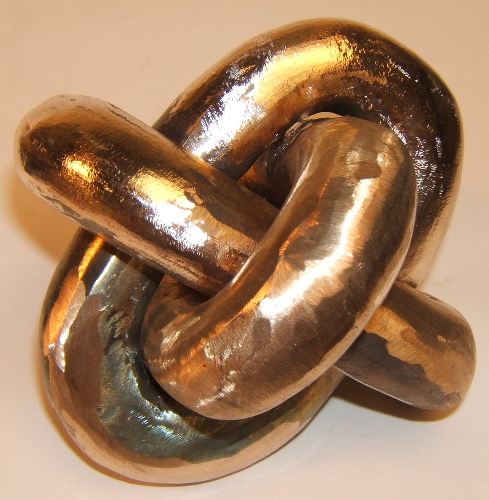
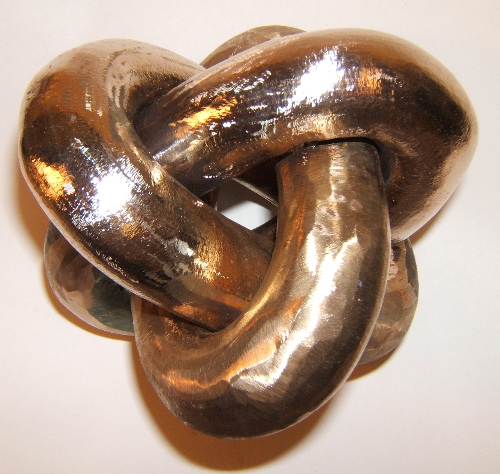
I attempted to put a patina on the bronze truncated Borromean rings which I cast before, but the first attempt was too dark, and did not show the copper veins as well as I had hoped. I tried again after cleaning off this attempt with a sand blasting. Both attempts are shown below.
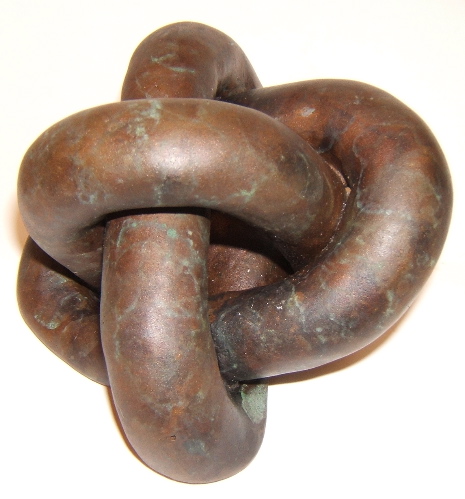
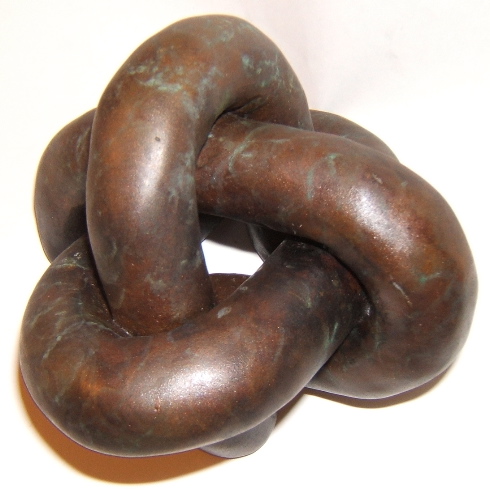
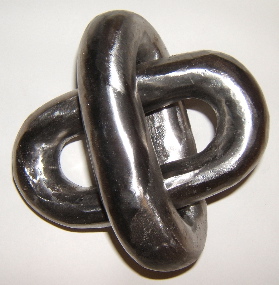
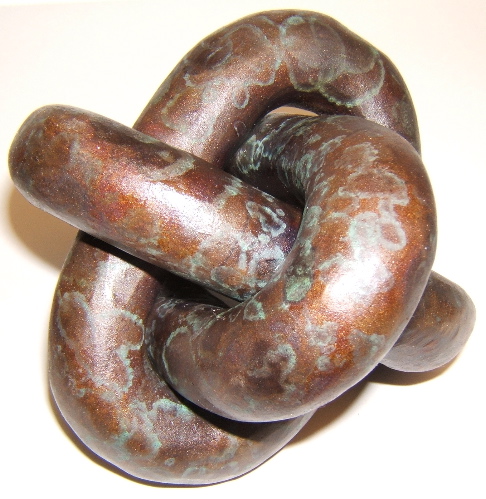
All my previous attempts to make the Borromean rings had some kind of problems during the pouring process, perhaps because I was trying to cast the rings in their linked positions. So I decided to try casting three separate links in bronze, to be linked later. This had the advantage that I could reach inside and all around each ring to polish them, but it meant I would in the final step have to cut one ring to link them together, and then weld that link back together with the others in linked position. Another difference was that these three rings were loose, and could move against each other, since they were really separate pieces. Here are two views of the resulting sculpture, somewhat polished but before any patina is applied. The third picture shows how it looked after I put a patina on it.
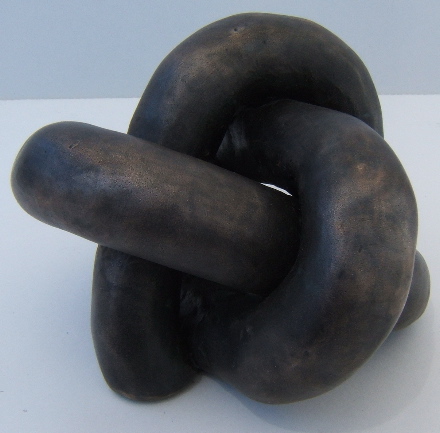
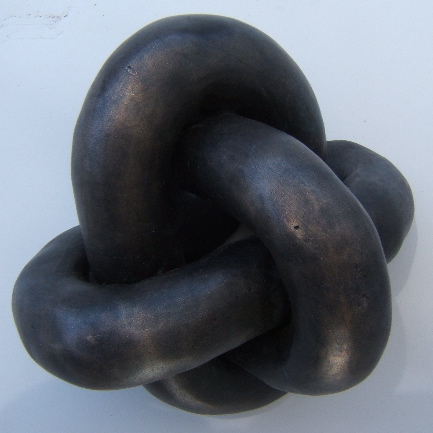
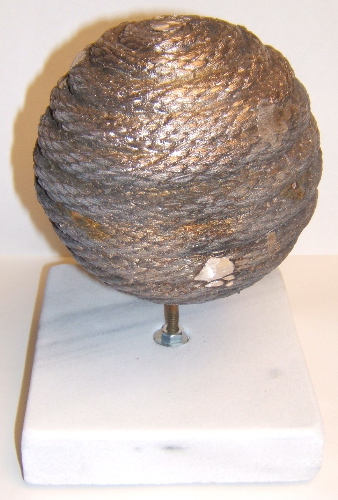
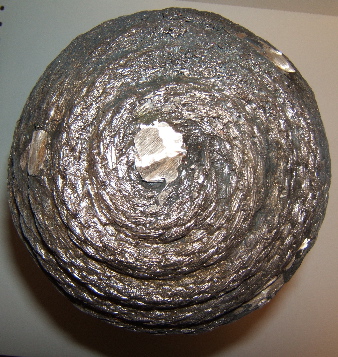
One of the students in the sculpture studio class (Kevin Dart) used a rope in a sculpture in order to get its complex texture. The rope he used did not completely burn out in the kiln, but I thought the idea was a good one. I decided to try using a polypropoline rope, which would be more likely to completely burn out in the kiln. Many possible sculptures could be made from such a rope (knots!), but I decided to try covering the surface of a ball with it, going from north to south pole. I did not want to cast a solid ball, however, because that would be too heavy (expensive!), so I had to use a technique which would produce a hollow sphere. I first made a plaster cast of a styrofoam ball, then filled it with the plaster and sand mixture used for making the casting molds. When I had that ``core mold" I covered it with a thin sheet of wax. I then attached the rope to the wax ball by partly melting the wax with a bernzomatic torch. I drove 4" core pins of iron 2" into the ball, and attached the gating to the rope in as few places as possible, so as to minimize the places where the rope texture would have to be reconstructed. When the result was immersed in the usual cylinder of mold material, the core pins served to fix the internal core ball to the outer mold material, so when the wax and rope burned away in the kiln, the internal core ball could not move out of place. At the south pole of the ball, which was at the top in the kiln where the vents went out of the piece, I planned to open a hole giving access to the interior core ball. I was able to remove all that core material, creating a hollow ball whose exterior was the texture of the rope. I have never made a sculpture with a hollow interior before, so this was a new technique to me. Here are two views of the result, from the side and from above. I mounted it over a marble base in which a single bronze rod was set so the ball could be balanced on the rod, and can rotate on it when spun by hand.
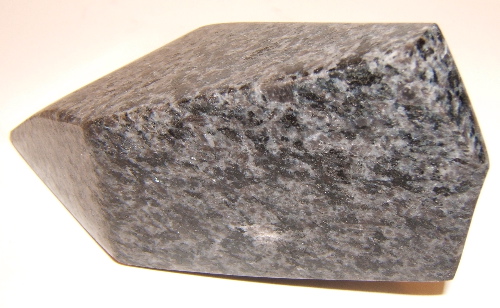
On a visit to see Helaman Ferguson, I saw him working in his studio on a huge granite sculpture based on an elliptic curve. He gave me a small chunk of granite which he was going to discard, and I took it home, hoping to shape it and polish it into a simple polytope. But the granite was so hard that it was very difficult for me to work on it with my ordinary tools. On a recent visit, I brought the rock, and Helaman gave me the chance to use some of his diamond cutting and polishing tools to finish it. It is only about 4 1/2" long, but is the only granite sculpture I have ever done.

To see more types of sculpture I have tried, follow the following links:
Links back to:
Webpage of Alex Feingold,
Department of Mathematical Sciences,
Binghamton University.